It is well known that the on-board Raspberry Pi audio out is terrible. So I wanted to find a solution that didn’t cost more than the Pi itself. I collected some different options and evaluated them for sound quality and ease of use. If you are an audiophile you can stop reading here. The goal wasn’t to find the best, most accurate audio output board. I was looking for something cheap, easy and great. I tested 8 different options and here are my findings.
How I tested
All of my tests were done using two different headphones. The first set is an over the ear JVC headphone that is no longer available. My second set is a Edifier H840. Both pairs have good music performance (again – these are not what I would call audiophile) and give clear sound across the whole sound spectrum. The Pi I used was a Raspberry Pi 2B. It’s the only Pi I have right now that wasn’t committed to another project. Since all Pis have the same audio out circuitry, using an older model will not affect the tests. I used the latest version of Raspbian Stretch and mpg123 (mpg123 -a plughw:1,0 song.mp3) for music playback. For the music samples I used several different mp3 files from my collection. All samples were local to the Pi and I didn’t stream any files. As with any audio test like this, the result is 90% subjective. I do think that there is a small part of the test that everyone will agree to. I did not test the audio in for any board.
The test subjects
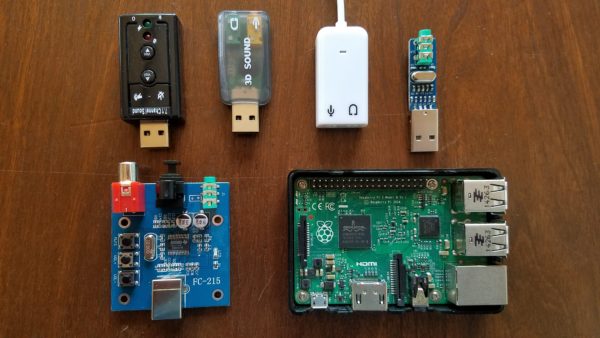
Top row
3 different generic USB audio devices, Mini USB DAC
Bottom Row
Full sized DAC, The Raspberry Pi audio out (two styles)
Not Shown
HDMI to VGA/Audio out
TL;DR
Each solution has pros and cons. Here are the three best solutions for —
ease & cost: The improved Pi audio out
general use: USB device #3
quality/flexibility: The full sized DAC board
The Results
The Standard Pi audio out
The standard audio out really has no advantages other than it is there. The sound isn’t good enough for music and I found there was background noise that was annoying. If all you need is an error tone this will work. For everything else keep reading.
The improved Pi audio out
Over the last 18 months the Pi audio driver has been reworked and the output is greatly improved (but the driver is still in testing). For an in depth discussion see this thread https://www.raspberrypi.org/forums/viewtopic.php?f=29&t=195178. To enable the improved audio driver, add audio_pwm_mode=2 to /boot/config.txt and reboot. I found the result to be a huge improvement but there are still some minor issues with sound quality. I was able to hear small amounts of noise on some samples. Nothing crazy and I was specifically listening for problems. Also note – the improvement comes at a cost. The audio is reduced to a 7 bit sample. That results in less sound quality. I will say that this is good enough for a gaming Pi. Not sure if 7 bits is enough? Try this sound test http://www.audiocheck.net/blindtests_16vs8bit.php.
If you are using DietPi, to select the improved audio run dietpi-config and select Audio options > Sound card > rpi-bcm2835-ultrahq. The system will then reboot and you’ll be good to go.
A HDMI to VGA cable with audio out
If you are not using the HDMI connector for video, it can still provide excellent audio output. The connector is low cost and super simple to use. It keeps you from dedicating a USB port for audio. Check here for the cable I recommend. It is a little more expensive than the other options and if you are using the HDMI out for video you’ll need to look at the different solutions.
Generic USB options
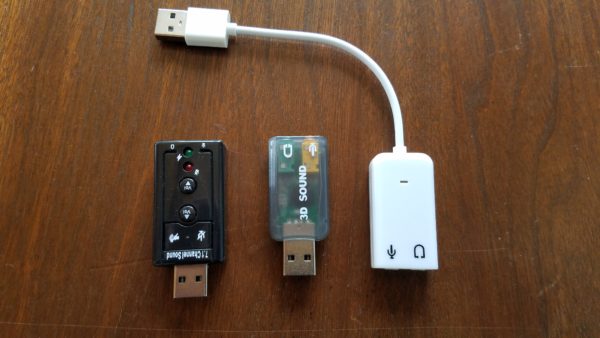
Generic USB audio #1
This is the one on the left. I has high hopes for this. It has volume and mute buttons and seemed to have a better package than the other USB options. But it sucks. It sounded awful. Just avoid it. Tech note – the output from the lsusb command is Bus 001 Device 008: ID 1b3f:2008 Generalplus Technology Inc.
Generic USB audio #2 & #3
Get it here – Adapter #3 From Amazon or direct from China
The middle and right subjects. I am grouping these together because (for me) they use the same internal part. I couldn’t figure out the exact chip used but I think it is the HS-100B from C-Media. These dongles have headphone out and microphone in. The sound quality was good. According the the C-Media site the chip uses a 16 bit DAC and includes a headphone amplifier. Both sounded good but #2, the self-contained version was poorly built. I think if you bumped it once it would break. The #3, corded version seems to be more solid. Both had a LED that flashes when in operation which I found annoying. Tech note – the output from the lsusb command is Bus 001 Device 009: ID 8086:0808 Intel Corp.
DAC Options
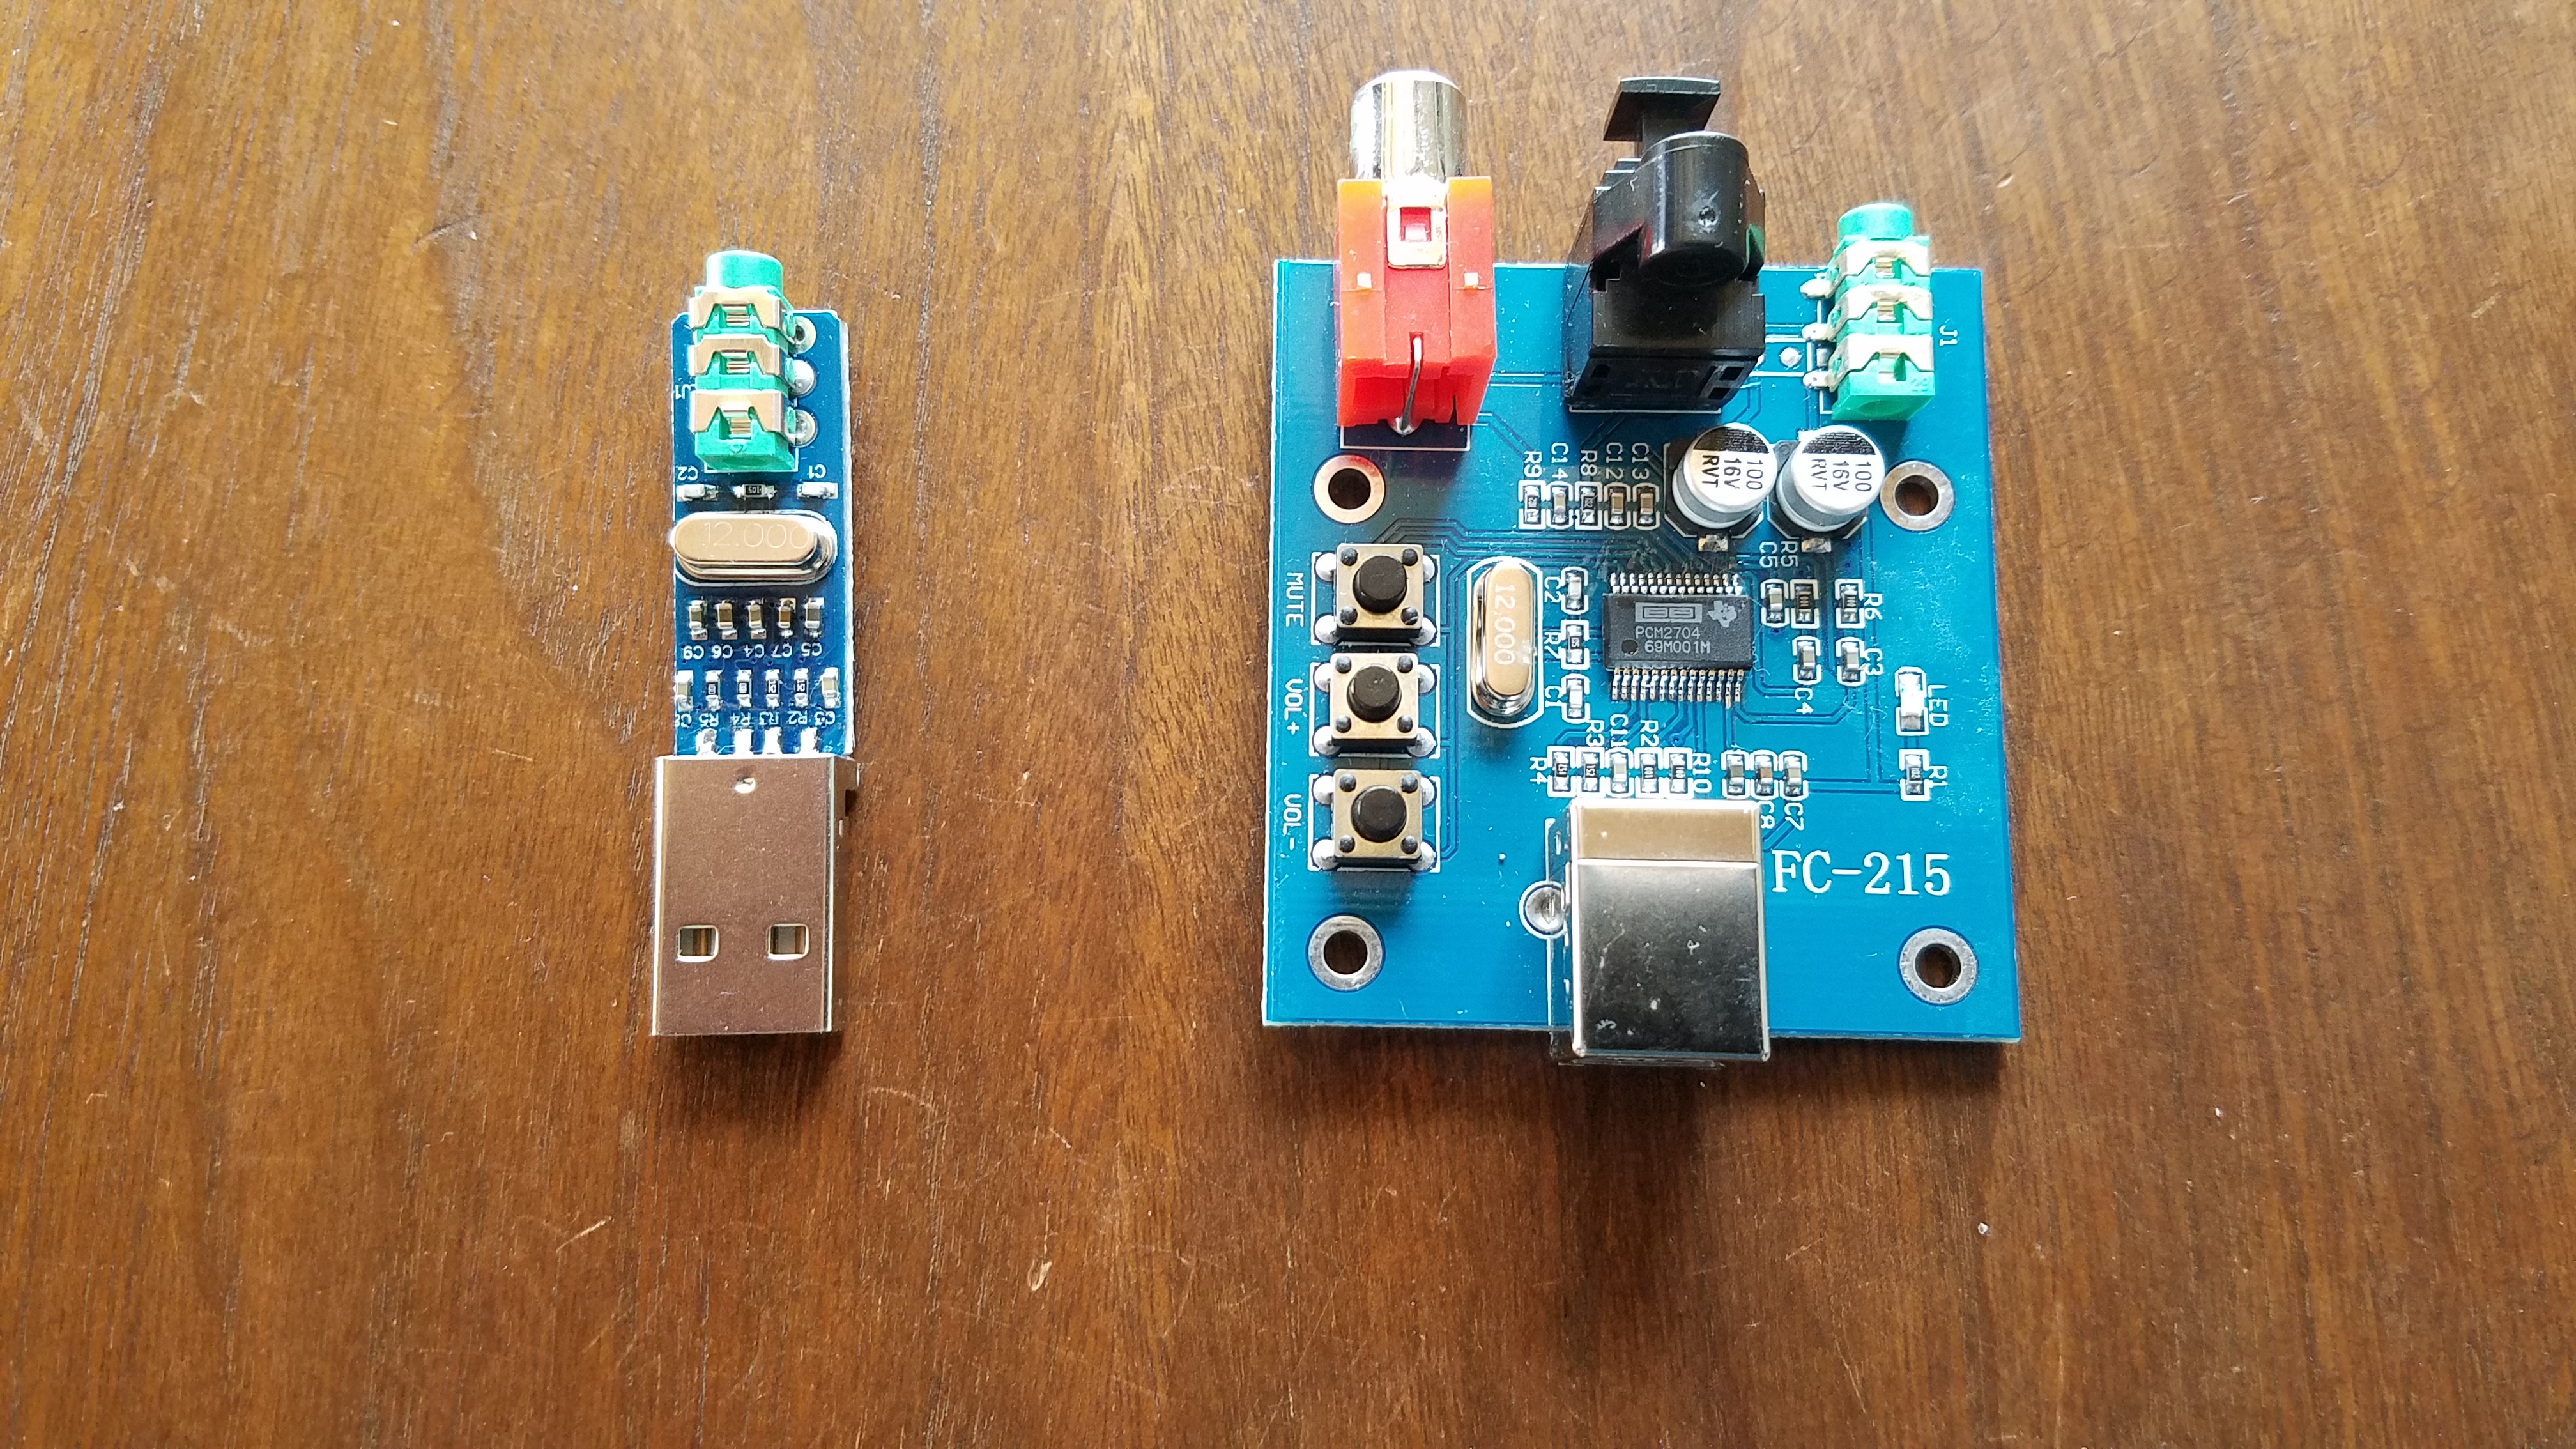
Mini DAC Board
To get quality audio out of a computer (or phone) you need a DAC. As you would imagine audio DAC chips vary in performance. This board uses the PCM2704 which is a mid-range part with excellent performance. It supports 16 bit output running at a variety of output rates. The mini board is a no-frills option. It doesn’t even include a case! But it is supported out of the box by Raspbian and it sounded awesome. Pure, clear audio with no distortion or interference from the Pi itself. The only downside was the missing case. Maybe someone can design one for thingaverse. Tech note – the output from the lsusb command is Bus 001 Device 010: ID 08bb:2704 Texas Instruments Audio Codec
Full Size DAC Board
Get it here – From Amazon or direct from China.
This board has the identical DAC to the mini board. But there are some improvements. To start, there are volume and mute buttons. These will work with some GUI audio players but they didn’t work with mpg123. Next there are some improved electrical parts including better capacitors and a ‘in use LED.’ But the big win are the S/PDIF lines. These pass the digital signal directly to another piece of audio equipment such as a A/V Receiver. If you are using the Pi in a home theater, this is the only way to go. It can pass the 5.1 or 7.1 surround signal directly to your home theater amp. It gives the Pi a direct digital-to-digital connection to your A/V receiver for the cleanest, best quality output. These boards are available with a case for a little extra cash. The only strange part is the USB B connector. I had to dig through my cable box to find one of these cables.
Conclusions
I will start with the options that are clearly not recommended: The Pi audio out is not an option for music. It sounds about as good as the mini speaker on an iPhone. Also, the USB audio #1 is not recommended.
Next, the USB audio #2 and the mini DAC board sounded great but the physical performance kept them from the top positions. The USB #2 is not durable and any amount of stress will damage it. The mini DAC board is constructed a little better, but without a case it is only useful if the Pi and the board are mounted in a larger case. The HDMI converter sounds great but is more expensive and not an option for some.
Finally, the winners!! For some, the improved audio out on the Pi itself may be enough. It’s free and works in most situations especially retro gaming. If you need something a little better, try the USB adapter #3. It is cheap, well constructed and gives good performance. The full sized DAC board is the overall winner. It offers the best performance and output options. If you get it with an aluminium case, it is super durable.
I’m always searching for options to test so if you find something different, let me know in the comments or send an email.


